
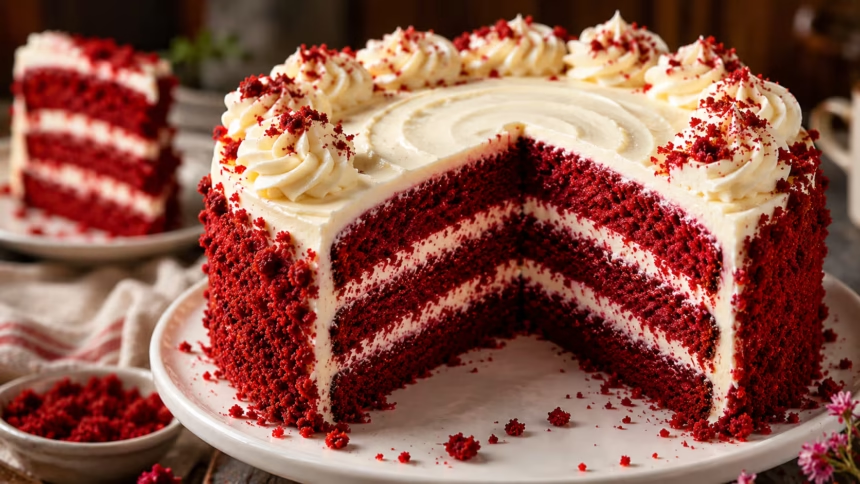
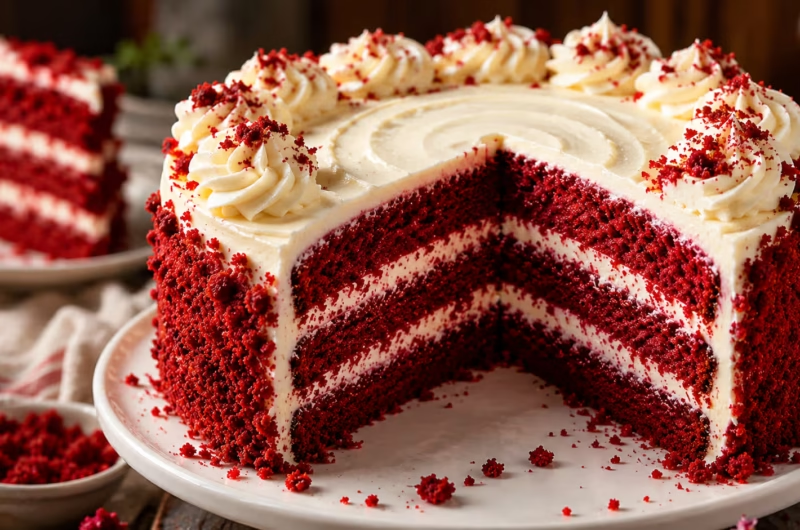
There’s something incredibly satisfying about learning how to make red velvet cake from scratch at home. This delicacy is both elegant and soothing with its soft velvety texture, creamy buttery flavor, mild chocolate flavor and smooth cream cheese frosting. A homemade red velvet cake done exactly should be soft, delicate, faintly chocolatey and properly balanced with tangy icing in every slice.
- Ingredients Needed to Make Red Velvet Cake
- Ingredients for Cream Cheese Frosting
- Step-by-Step Guide on How to Make Red Velvet Cake
- Common Mistakes When Making Red Velvet Cake
- How to Store Red Velvet Cake
- Best Occasions to Serve Red Velvet Cake
- Final Thoughts
- How to Make Red Velvet Cake Perfectly Every Time
In my experience, the main difference between a red velvet cake that is just good and one that is genuinely excellent is the moisture and frosting balance. I’ve discovered that the use of buttermilk and not over-mixing makes the cake so much softer and gives it that classic velvety feel people expect from a decent red velvet cake.
Whether you’re making it for birthdays, holidays, anniversaries or just want a handmade dessert recipe, this precise step-by-step tutorial will help you make a gorgeous and tasty red velvet cake with confidence.
READ MORE: How to Bake a Moist Eggless Lemon Loaf Cake for Fresh Summer Evenings
Ingredients Needed to Make Red Velvet Cake
Each ingredient in a red velvet cake recipe is vital for giving the cake its trademark flavor, wetness, and velvety texture.
All-Purpose Flour
The cake structure is provided by flour. Proper measurement ensures that you don’t end up with a dense or dry cake texture.
Cocoa Powder
A modest amount of cocoa powder is added to red velvet cake to give it a mild chocolate flavor. The cake can be overwhelmed by too much cocoa and the red hue will be darkened.
Buttermilk
Buttermilk gives the sponge cake a silky texture and adds a subtle tang that balances the sweetness well.
Eggs
Eggs give richness and moisture to the cake mix and also help bind it together.
Butter or Oil
Oil or butter helps to make a moist cake texture, and butter provides flavor. Many home bakers combine both for the greatest results.
Sugar
Sugar is what sweetens the cake, but it also helps maintain the crumb supple and flexible.
Vanilla Extract
Vanilla extract adds to the overall flavor and lends the cake a warm bakery-style scent.
Baking Soda
Baking soda interacts with acidic elements like buttermilk and vinegar to help the cake rise properly.
Vinegar
A bit of vinegar enhances the red velvet flavor and lends to the cake’s softness.
Red Food Coloring
The cake gets its signature deep red hue from red food coloring. Gel food coloring gives the brightest effects and doesn’t need to be thinned with the batter.
Ingredients for Cream Cheese Frosting
You can’t go wrong with a traditional red velvet cake and a creamy cream cheese frosting.
Cream Cheese
Cream cheese adds tanginess and creamy texture that goes wonderfully with the subtle cocoa flavor.
Butter
The butter helps to solidify the frosting and gives it a rich buttery touch.
Powdered Sugar
Powdered sugar is used to sweeten the frosting and also helps achieve a smooth consistency.
Vanilla Extract
The cream cheese taste is enhanced and the frosting flavor is rounded off with vanilla.
The frosting should be creamy and smooth and spreadable and a little tangy and not too sugary.
Step-by-Step Guide on How to Make Red Velvet Cake
This is the most important part of the recipe. Follow each step carefully for the best homemade red velvet cake results.
Step 1: Preparing the Cake Pans
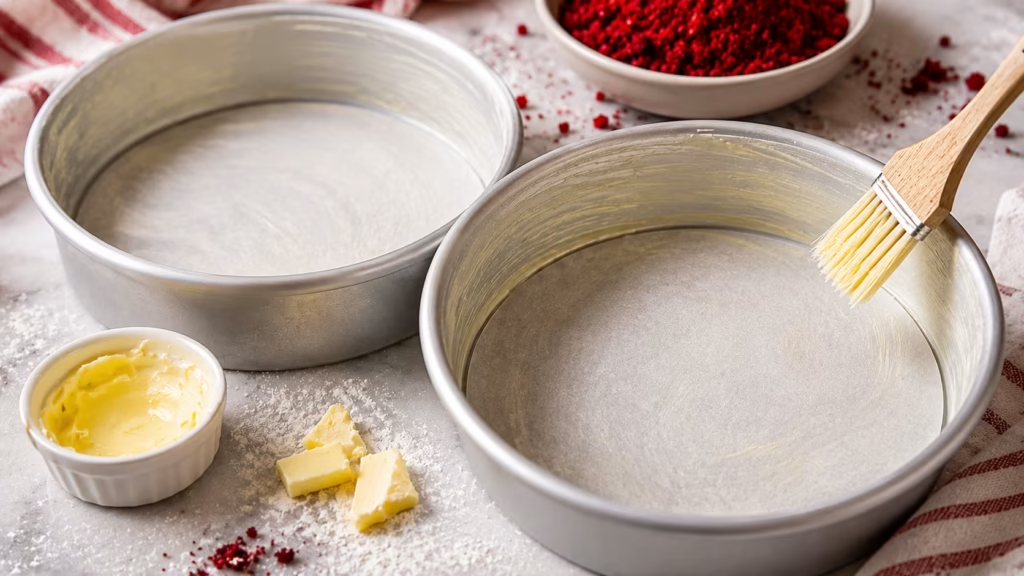
Set the oven to 350° F (175° C).Grease two 8-inch or 9-inch cake pans with butter or oil and line the bottoms with parchment paper.
Good pan prep will stop the cake layers from sticking and help keep the edges smooth.
A common mistake is to leave out parchment paper, which can cause breaking of delicate cake layers when removing it.
Step 2: Mixing the Dry Ingredients
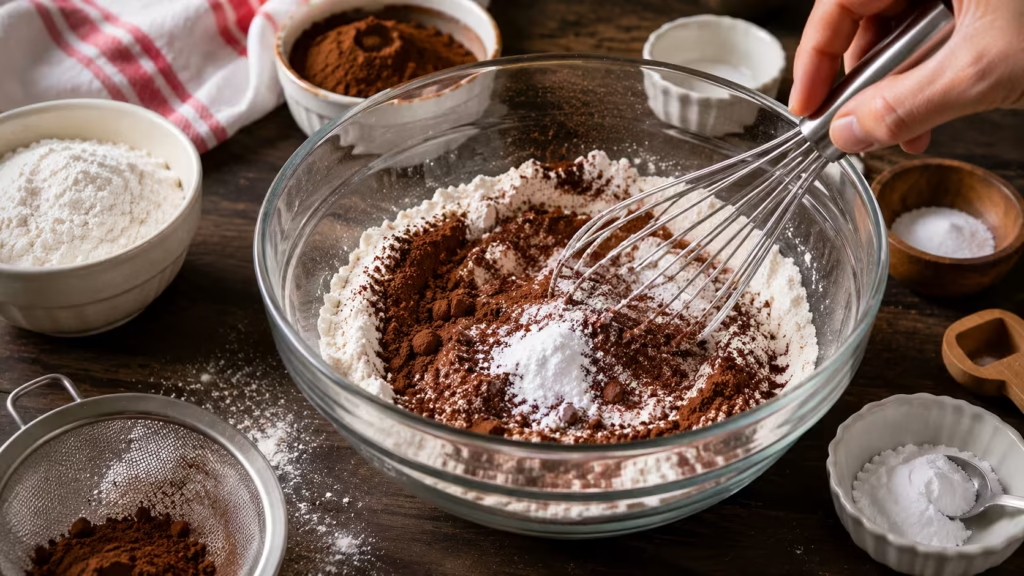
In a large mixing bowl, whisk together:
- Flour
- Cocoa powder
- Baking soda
- Salt
The whisking helps to uniformly incorporate the cocoa powder and the leavening agents in the cake batter.
Don’t put everything in at once, or you may end up with an uneven cake or pockets of cocoa powder.
The dry ingredients should be smooth and lump-free before proceeding to the next stage.
Step 3: Preparing the Wet Ingredients
In another bowl, combine:
- Sugar
- Eggs
- Buttermilk
- Melted butter or oil
- Vanilla extract
- Red food coloring
- Vinegar
Whisk until smooth, shiny and evenly pink.
The color should appear vibrant before adding the dry ingredients because baking slightly darkens the cake.
Room temperature components are better, as they combine more evenly and make a smoother batter.
Step 4: Making the Red Velvet Batter
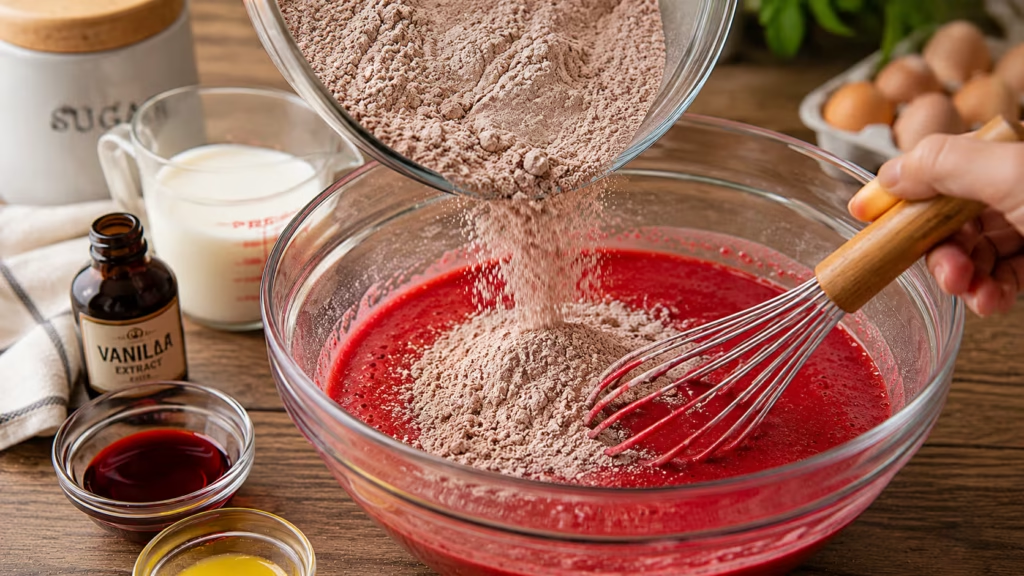
Add the dry ingredients to the wet components gradually and fold in gently.
Personally, I prefer mixing the batter gently with a spatula during the final stage instead of using a high-speed mixer. It keeps the cake moist and prevents the crumb from getting too dense.
Don’t overmix the batter. Stir only until no streaks of flour remain.
Overmixing will activate excess gluten which can make the cake thick and not soft and silky.
The batter, when finished, should be smooth, silky and slightly thick, but not heavy.
If the batter is too thick, check your flour measurements again.
Step 5: Baking the Cake
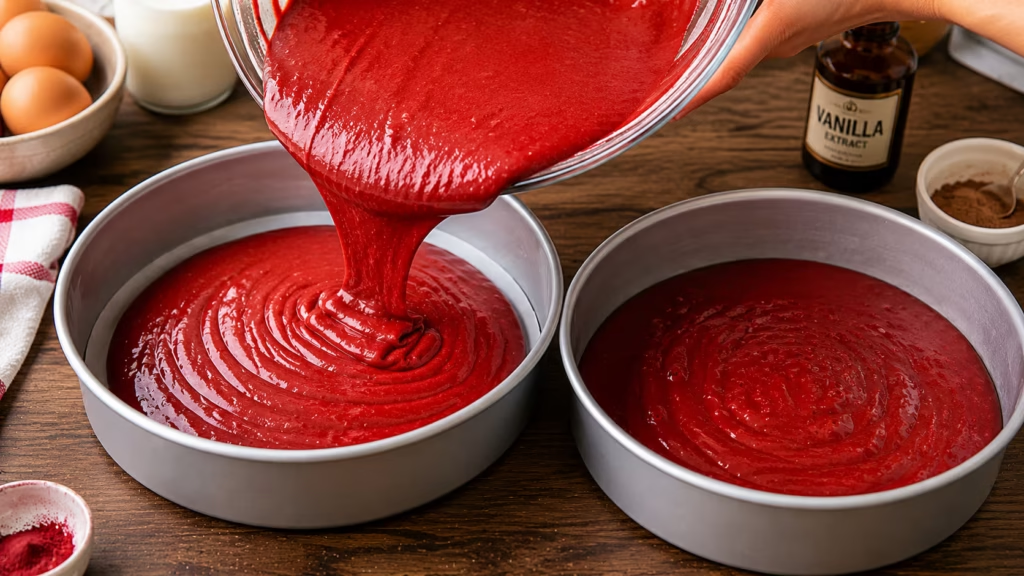
Divide the batter evenly between the prepared cake pans.
Bake at 350°F (175°C) for approximately 28–32 minutes.
You’ll know the cakes are done when:
- The tops spring back lightly
- A toothpick inserted into the center comes out mostly clean
- The edges slightly pull away from the pan
Avoid opening the oven repeatedly during baking because sudden temperature drops can cause uneven layers.
Incorrect baking temperature is one of the biggest causes of dry cake texture.
Step 6: Cooling the Cake Layers
Allow the cakes to cool in the pans for 10-15 minutes before turning out onto a wire rack.
Allow cake layers to cool completely before icing.
Cream cheese icing on warm cake layers might melt and make a mess of your layers.
Many bakers chill the cake layers before icing for 20-30 minutes to make for cleaner cake layering.
Step 7: Preparing the Cream Cheese Frosting
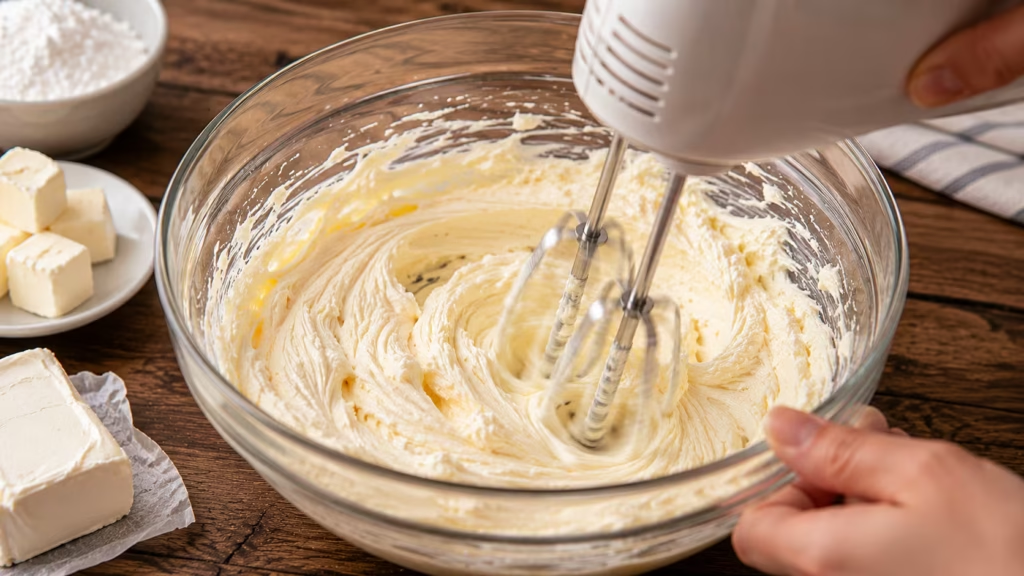
In a mixing bowl, whip the softened cream cheese and butter until smooth and fluffy.
Gradually add the powdered sugar, mixing on low. Add vanilla extract and beat until smooth.
The frosting should be thick and spreadable and smooth.
If the frosting becomes too soft, let it chill for 15-20 minutes before using.
Don’t over beat, it can loosen the consistency of the frosting too much.
I normally pop the frosting in the fridge for a few minutes before I put the cake together as slightly cooled frosting spreads a lot better and makes it easier to layer, especially for novices.
Step 8: Frosting and Layering the Cake
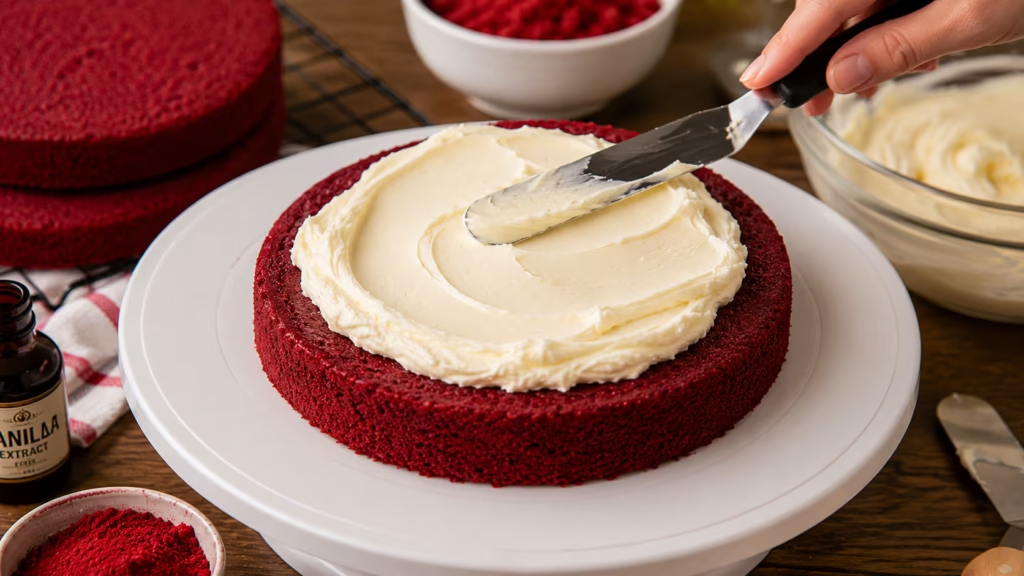
Place first layer of cake on a cake plate or serving dish.
Using an offset spatula, spread a uniform layer of cream cheese frosting on top.
Place the second piece of cake on top and spread icing around the top and edges.
For the smooth frosting techniques:
- Chilled sponge rounds
- Start with a thin crumb coat
- Chill for a few minutes before icing
This helps achieve clean cake decorating results and prevents crumbs from mixing into the frosting.
Step 9: Final Decoration and Serving
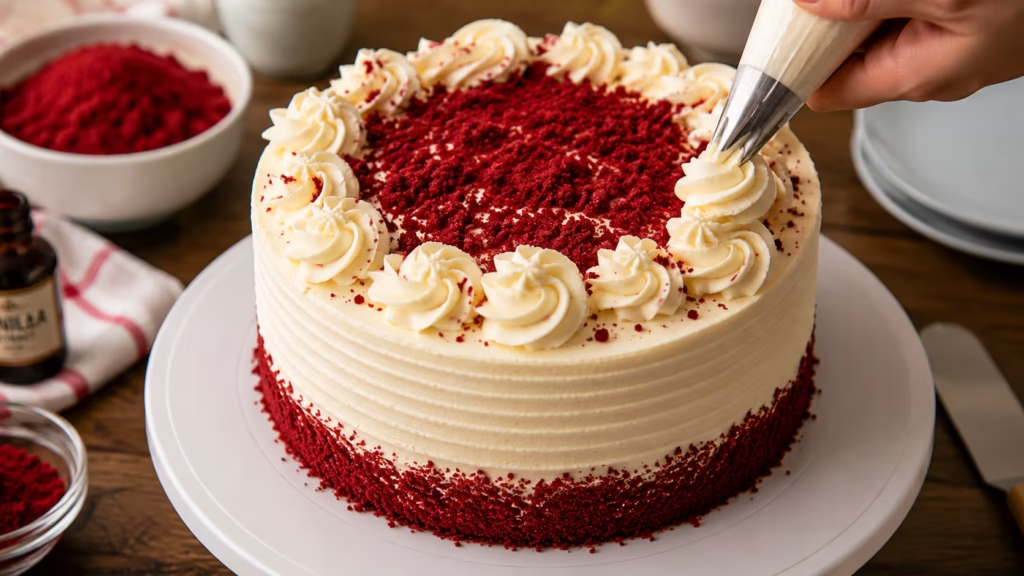
Frost the cake with additional icing, cake crumbs or simply piped patterns.
Some bakers like to sprinkle red velvet crumbs around the edges for a typical bakery appearance.
For optimal flavor and texture, chill cake for about 30 minutes before serving.
Serve slightly cold, or let stand at room temperature for 15 minutes before serving.
The finished cake should be:
- Soft sponge texture
- Moist Crumb
- Light chocolate flavor
- Smooth cream cheese frosting
- Sweetness balanced
Common Mistakes When Making Red Velvet Cake
Too much mixing of the batter
This gives a dense, chewy texture opposed to smooth crumb.
Excess Cocoa Powder
Red velvet cake should have a mild cocoa flavor, not a robust chocolate flavor.
Wrong oven temperature
Oven too hot, can dry out the cake quickly.
Warm Cake with Frosting Layers
Warm cake melts cream cheese frosting and unstable layers.
Uneven Cake Layers
Uneven batter distribution results in slanted cakes and icing problems.
Do not let to cool.
Rushing through the process can ruin the cake’s texture and decoration.
How to Store Red Velvet Cake
Because of the cream cheese frosting, red velvet cake needs to be kept in the refrigerator.
Keep the frosted cake in an air-tight container or tightly wrap in plastic wrap.
In the fridge, the cake stays fresh for about 4-5 days.
For optimal texture, let the refrigerated cake sit at room temperature 15-20 minutes before serving.
Unfrosted cake layers can be carefully wrapped and frozen for future use.
Best Occasions to Serve Red Velvet Cake
Red velvet cake is perfect for:
- Birthday and Anniversary parties
- Sweets for the holidays
- Valentine’s Day
- Family reunions
- Dinner parties
- Cakes for Celebrations
Its vivid red color and creamy frosting make it a visually striking homemade dessert dish to serve for special occasions.
Final Thoughts
Once you understand how to make red velvet cake properly, it becomes one of the most rewarding homemade baking recipes to master.The rich, velvety cake layers, subtle chocolate flavor, and silky cream cheese frosting all come together to produce a dessert that seems beautiful yet cozy and inviting.
It’s all about making sure that you make the cake batter properly, baking at the right temperature, gently mixing, and giving the cake enough time to cool before you decorate. By following these simple practical methods, even rookie bakers may produce a red velvet layer cake that is soft and moist, with exquisite texture and balanced flavor.
I always think homemade red velvet cake is more wonderful than store purchased, because you can customize the texture, sweetness and frosting precisely how you like it. The new cream cheese icing and cake layers make a big difference.
How to Make Red Velvet Cake Perfectly Every Time
Course: Cake, Dessert10–12 slices
servings25
minutes30
minutes520 Approximate Per Slice
kcalIngredients
- For the Red Velvet Cake
2 ½ cups all-purpose flour
2 tablespoons cocoa powder
1 teaspoon baking soda
½ teaspoon salt
1 ½ cups granulated sugar
2 large eggs
1 cup buttermilk
1 cup vegetable oil or melted butter
1 tablespoon vanilla extract
1 teaspoon white vinegar
2 tablespoons red food coloring
- For Cream Cheese Frosting
16 oz cream cheese, softened
½ cup unsalted butter, softened
4 cups powdered sugar
1 teaspoon vanilla extract
Directions
- Step 1: Prepare the Cake Pans
Preheat oven to 350°F (175°C). Grease two 8-inch cake pans and line with parchment paper - Step 2: Mix Dry Ingredients
In a bowl, whisk together flour, cocoa powder, baking soda, and salt. - Step 3: Prepare Wet Ingredients
In another bowl, whisk sugar, eggs, buttermilk, oil, vanilla extract, vinegar, and red food coloring until smooth. - Step 4: Make the Batter
Gradually combine dry ingredients with wet ingredients. Mix gently until smooth without overmixing. - Step 5: Bake the Cake
Divide batter evenly into cake pans. Bake for 28–32 minutes or until a toothpick inserted in the center comes out mostly clean. - Step 6: Cool the Cake Layers
Let cakes cool in pans for 10–15 minutes, then transfer to a wire rack to cool completely. - Step 7: Prepare the Frosting
Beat cream cheese and butter until fluffy. Add powdered sugar gradually and mix in vanilla extract. - Step 8: Frost and Layer
Spread frosting between cake layers and cover the top and sides evenly. - Step 9: Decorate and Serve
Decorate with cake crumbs or piping if desired. Chill briefly before slicing and serving.
Notes
- Use room-temperature ingredients for smoother batter.
Avoid overmixing to keep the cake soft and tender.
Gel food coloring gives a brighter red color.
Chill frosting if it becomes too soft.
Cool cake layers completely before frosting.


